Layered Italian Picnic Sandwich
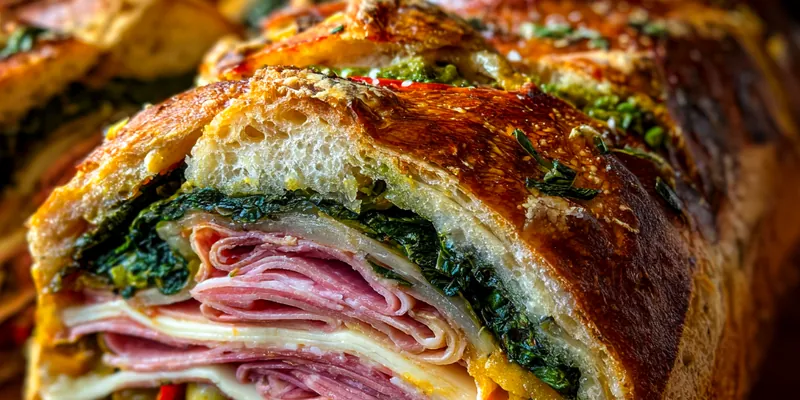
The Layered Italian Picnic Sandwich is a delightful combination of robust Italian flavors, perfect for any lunch or picnic outing. This sandwich features layers of savory meats, cheeses, and fresh vegetables, all enveloped in a crusty ciabatta loaf. It’s easy to prepare, making it a favorite choice for gatherings and outdoor meals. Enjoy the taste of Italy with each delicious bite!

Why This Layered Italian Picnic Sandwich Recipe Works
This layered Italian picnic sandwich brings together the best of Italian ingredients, creating a harmonious blend of flavors and textures. The ciabatta bread provides a sturdy hold for the generous fillings, while the combination of meats and cheeses makes it a protein-packed delight. Fresh vegetables add crunch and brightness, making each bite a balanced experience. Plus, the easy preparation means you can whip it up quickly!
The key to this sandwich is allowing it to chill, which helps the flavors meld beautifully. As the sandwich sits, the crusty bread absorbs just enough dressing to enhance the taste without becoming soggy. This technique ensures that you enjoy a hearty and fulfilling lunch that stays fresh and tasty, whether served at home or on a picnic.
💡 Professional Tip
For the best results, use high-quality ingredients, especially the meats and cheese. Freshly sliced deli meats and artisanal cheese elevate the flavor profile significantly. Additionally, let the sandwich rest in the refrigerator for at least 30 minutes. This resting time allows the flavors to blend and the bread to soften slightly, creating a perfect, delicious sandwich.
Frequently Asked Questions
Yes, you can prepare the sandwich a day in advance. Just wrap it tightly in plastic wrap and store it in the refrigerator. This will allow the flavors to develop even more. However, it's best to eat it within 24 hours for the freshest taste.
If you don't have roasted red peppers on hand, you can use fresh bell peppers or sun-dried tomatoes for a slightly different flavor. Both options will still provide a delicious taste and complement the sandwich well.
Once you've assembled the sandwich and wrapped it, refrigerate it for at least 30 minutes. The sandwich is ready when the flavors have melded and the bread has softened slightly without becoming soggy. Check for a nice balance of flavors when you slice into it.
It is not recommended to freeze this sandwich as the bread can become soggy when thawed. However, you can freeze the meat and cheese separately and assemble the sandwich fresh when you're ready to enjoy it.
This sandwich pairs well with a light salad, such as a Caesar or mixed greens, or fresh fruit for a refreshing side. You can also serve it with chips or a pasta salad for a more filling meal.
The sandwich is best enjoyed fresh but can last in the refrigerator for up to 2 days. Make sure it is wrapped tightly to maintain its freshness and prevent it from drying out.
Absolutely! You can make this sandwich a few hours or even a day ahead. Just be sure to wrap it well to keep it fresh in the fridge. The flavors will meld and improve as it sits.
If you want to reheat leftovers, it's best to do so in an oven or toaster oven at a low temperature to avoid making the bread too hard. Wrap it in foil to help retain moisture while heating.
Recipe Troubleshooting Guide
Too Dry
Problem: The sandwich lacks moisture and flavor.
Solution: Try adding a bit more dressing or mayonnaise to the layers for extra moisture. You can also include more vegetables that contain moisture, like tomatoes.
Not Crispy Enough
Problem: The sandwich does not have a satisfying crunch.
Solution: To achieve a crispier bread, toast the ciabatta lightly before assembling the sandwich, or use a panini press after assembly to add a crispy texture.
Overcooked
Problem: Some ingredients may become tough or lose their flavor.
Prevention: Be mindful of the chilling time; don’t leave it too long in the fridge. If the ingredients start to dry out, consider adding a fresh layer of dressing when serving.
Undercooked Center
Problem: The sandwich ingredients feel cold and not well combined.
Recovery: Make sure to let the sandwich rest in the fridge for the recommended time to allow the flavors to meld. Slice into it after chilling to ensure even distribution of flavors.
Burnt Exterior
Problem: The bread is charred while the inside remains cold.
Prevention: When toasting or grilling, keep an eye on the sandwich and lower the heat. Cooking it slowly will help avoid burning while warming the interior.
Flavor Balance
Too Sweet: To fix a sandwich that is too sweet, add a little acidity with extra balsamic vinegar or a squeeze of lemon.
Too Salty: If the sandwich is too salty, balance it with additional fresh vegetables or a light spread of cream cheese to mellow the flavors.
Bland: Boost the flavor by adding more seasoning to the dressing or including additional herbs like basil or oregano.
Essential Ingredients for Layered Italian Picnic Sandwich
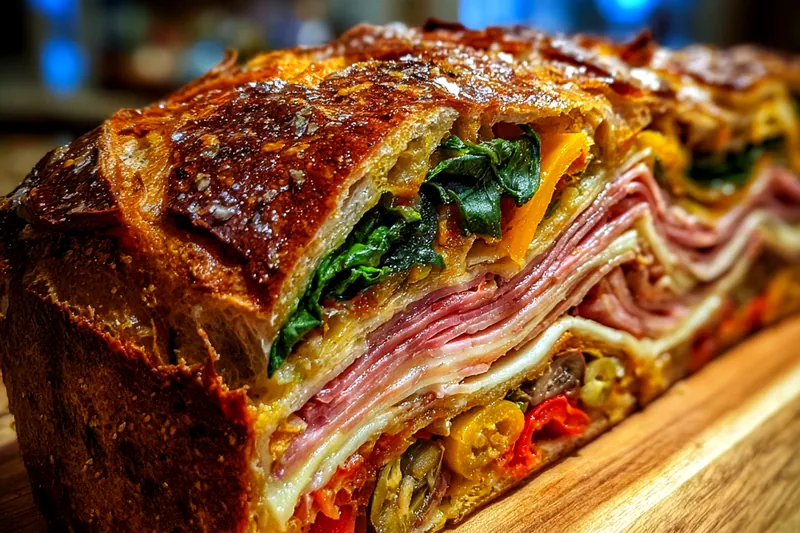
The success of the Layered Italian Picnic Sandwich lies in using fresh, high-quality ingredients. The ciabatta bread provides the perfect crunchy exterior while remaining soft inside, forming a solid base for the flavorful fillings. The variety of meats adds depth, and the cheeses melt together to create a rich taste. Fresh vegetables not only enhance the flavor but also contribute to a satisfying crunch.
Selecting the best ingredients is key to achieving the ultimate flavor. Opt for locally sourced or artisanal meats and cheeses whenever possible. Fresh greens and vegetables should be crisp and vibrant, as they play a crucial role in the overall taste and texture. Quality olive oil and balsamic vinegar will enhance the dressing, tying all the flavors together beautifully.
Essential Ingredient Notes
- Ciabatta Bread: For the best results, choose a fresh ciabatta that has a nice crust. This will provide a sturdy structure for your layered sandwich. If possible, buy it from a local bakery for optimal freshness.
- Provolone Cheese: Opt for aged provolone cheese for a sharper flavor that complements the meats well. It melts beautifully and adds a rich, creamy texture that enhances the overall sandwich experience.
- Fresh Vegetables: Using fresh, crisp vegetables is essential for texture and flavor. Always wash and dry your greens thoroughly before layering them in the sandwich to prevent sogginess.
Step-by-Step Cooking Process
Making the Layered Italian Picnic Sandwich is straightforward and fun! Begin by preparing your ingredients and mixing the dressing. Layer everything carefully to build flavors and texture. Remember to let the sandwich chill, as this step is crucial for melding the ingredients.
Achieving perfect results depends on how well you layer your ingredients and the quality of your components. Each layer should complement the other, creating a balanced bite that showcases the flavors of Italy. With practice, you’ll master the art of sandwich-making.
Key Technique for Perfect Layered Italian Picnic Sandwich
The key to a successful Layered Italian Picnic Sandwich is the chilling process. This step allows the flavors to meld beautifully while the bread absorbs just enough dressing for added taste without sogginess. Make sure to wrap the sandwich tightly to keep it fresh and let it rest for at least 30 minutes before slicing.
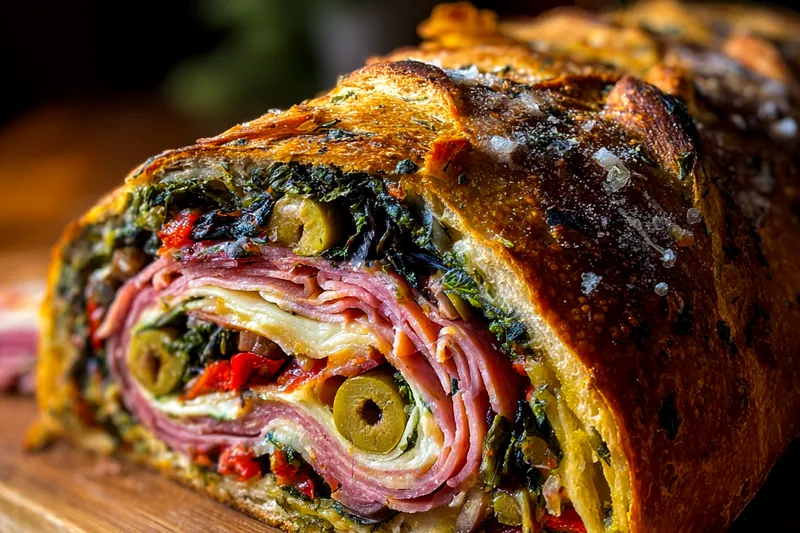
Layered Italian Picnic Sandwich
📋 Ingredients
Main Ingredients
- 1/4 cup olive oilExtra virgin, for dressing
- 1 tbsp balsamic vinegarAdds acidity
- 1 tsp Italian seasoningFor flavor
- Salt and pepperTo taste
For the Sauce
- 1 loaf ciabatta breadFresh, cut in half
- 8 oz sliced salamiFor flavor
- 8 oz sliced hamTasty addition
- 8 oz provolone cheeseMelts well
- 1 cup roasted red peppersFor sweetness
- 1 cup fresh spinachAdds crunch
- 1/2 cup sliced black olivesBrings saltiness
- 1/2 cup arugulaFor freshness
Instructions
Prepare the Bread
Slice the ciabatta loaf in half horizontally and set the top half aside.
Make the Dressing
In a small bowl, whisk together olive oil, balsamic vinegar, Italian seasoning, salt, and pepper.
Layer the Ingredients
Start layering the ingredients on the bottom half of the ciabatta. Begin with salami, followed by ham, provolone cheese, and roasted red peppers.
Add Greens
Add spinach, black olives, and arugula on top of the layered meats and cheese.
Drizzle Dressing
Drizzle the prepared dressing evenly over the layered ingredients.
Top It Off
Place the top half of the ciabatta back on and press down gently.
Wrap and Chill
Wrap the sandwich tightly in plastic wrap and refrigerate for at least 30 minutes to allow the flavors to meld.
Slice and Serve
Once chilled, slice the sandwich into individual portions and serve. Garnish with fresh basil leaves if desired.
Recipe Notes & Tips
Storage Tips
To store your layered Italian picnic sandwich, keep it wrapped tightly in the refrigerator. This will help maintain its freshness for up to two days. Avoid leaving it uncovered, as it can dry out quickly.
Serving Suggestions
Serve the sandwich with a side of chips or a light salad for a complete meal. It’s also great alongside fresh fruit or pickles to balance out the flavors.
Recipe Variations
Feel free to customize this sandwich with your favorite ingredients. Swap out the meats for turkey or chicken, or add different cheeses like mozzarella or feta. You can also experiment with various spreads, such as pesto or hummus for a unique twist.