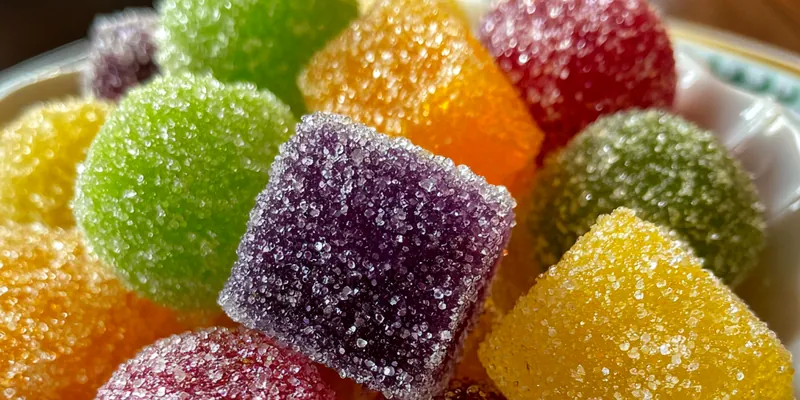
Colorful Sugar-Coated Candies
Colorful Sugar-Coated Candies are a delightful treat that brings joy to any gathering. These candies are easy to make and can be customized with your favorite colors and flavors. Perfect for kids' parties or as a festive snack, they are sure to impress. With a crunchy sugar coating and a hint of chocolate, these candies are irresistible!

Why This Colorful Sugar-Coated Candies Recipe Works
This recipe stands out because of its versatility and the vibrant colors that appeal to both kids and adults. The combination of crunchy candy coating and a hint of sweetness creates a delightful experience. Plus, the use of various nuts and fruits allows for personalization, making each batch unique.
The technique used in this recipe ensures that the sugar coating adheres perfectly, resulting in a satisfying crunch. By chilling the candies, we enhance the texture and flavor, making them even more enjoyable. The addition of chocolate adds richness, balancing the sweetness beautifully.
💡 Professional Tip
To achieve the best results, make sure your sugar mixture reaches the right temperature before cooling. This ensures a smooth coating. Additionally, experiment with different flavorings and colors to create a variety of candies that suit your taste.
Frequently Asked Questions
Yes, you can prepare Colorful Sugar-Coated Candies ahead of time. They store well in an airtight container for up to a week. Just make sure to keep them in a cool place to maintain their crunch and prevent the chocolate from melting.
If you have nut allergies or prefer not to use nuts, you can substitute them with seeds like sunflower or pumpkin seeds. Dried fruits, such as raisins or cranberries, also work well and add a chewy texture.
The candies are done when the sugar mixture has cooled and hardened on the nuts or fruits. After chilling, they should be firm to the touch but not too hard. The chocolate should also be set without any sticky residue.
Yes, you can freeze these candies. Place them in a single layer on a baking sheet to freeze individually, then transfer to an airtight container. They can last up to three months in the freezer. When ready to enjoy, thaw them at room temperature.
Colorful Sugar-Coated Candies can be served alongside other party snacks like popcorn or cake pops. They also pair well with fruit platters or as a topping on ice cream for a fun dessert.
In the fridge, these candies can last for about a week when stored in an airtight container. However, they are best enjoyed fresh to maintain their texture and flavor.
Absolutely! Making them in advance is a great idea, especially for gatherings. Just make sure to store them properly to keep them fresh and avoid moisture, which can affect their texture.
If the candies have become sticky or lost their crunch, avoid reheating in the microwave. Instead, place them on a tray in a low oven (around 200°F) for a few minutes to restore their texture. Watch closely to prevent melting.
Recipe Troubleshooting Guide
Too Dry
Problem: If the candies are too dry, they may not have enough moisture in the sugar mixture.
Solution: To fix this, ensure you measure the water accurately when preparing the sugar mixture. A small amount of additional corn syrup can also help retain moisture.
Not Crispy Enough
Problem: If the candies aren't crispy, they may not have cooked long enough.
Solution: Make sure the sugar mixture reaches the appropriate temperature before cooling. Also, allow the candies to chill longer to help them firm up.
Overcooked
Problem: Overcooked candies can become hard and difficult to eat.
Prevention: To prevent this, keep a close eye on the sugar mixture while cooking, and remove it from heat as soon as it reaches the desired temperature.
Undercooked Center
Problem: If the center of the candies is still soft, they may not have set properly.
Recovery: Return the candies to the refrigerator and let them chill for a longer time. Ensure they are spaced out on the tray so they can cool evenly.
Burnt Exterior
Problem: A burnt exterior can occur if the sugar mixture is heated too quickly.
Prevention: To avoid this, always heat the mixture on medium heat and stir continuously until dissolved. If the mixture begins to darken, reduce the heat immediately.
Flavor Balance
Too Sweet: If the candies are too sweet, consider reducing the sugar in the mixture next time.
Too Salty: To balance excess saltiness, add a touch of vanilla or chocolate to mask the flavor.
Bland: If the flavors are bland, try incorporating more flavor extracts or spices like cinnamon or nutmeg to enhance the taste.
Essential Ingredients for Colorful Sugar-Coated Candies
The key ingredients in this recipe include granulated sugar, water, and corn syrup, which create the base for the candy coating. Vanilla extract adds a delightful flavor, while food coloring gives each batch a unique and vibrant appearance. Optional ingredients like nuts and dried fruits enhance texture and taste.
Using high-quality ingredients will ensure the best flavor and texture for your candies. Fresh nuts and dried fruits provide better taste and crunch. Opt for natural food colorings whenever possible to achieve a beautiful, vivid look without artificial flavors.
Essential Ingredient Notes
- Granulated Sugar: Use fine granulated sugar for the best texture in your candy coating. Avoid using powdered sugar as it won't create the desired crunch.
- Corn Syrup: Corn syrup helps to prevent crystallization and keeps the candies chewy. It’s essential for achieving a smooth and shiny finish.
- Chocolate Chips: Select high-quality chocolate chips for dipping, as they will melt smoothly and provide a rich flavor. Dark chocolate can also be used for a deeper taste.
Step-by-Step Cooking Process
The cooking process for Colorful Sugar-Coated Candies is straightforward and enjoyable. Begin by preparing the sugar mixture, ensuring all ingredients are measured accurately. The key is to stir constantly while heating to achieve the perfect consistency.
Once the candies are coated, chilling them is crucial for setting the texture. Monitor the timing to ensure they are perfectly firm without becoming overly hard. This attention to detail will result in delightful candies that everyone will love.
Key Technique for Perfect Colorful Sugar-Coated Candies
The most important technique is managing the temperature of the sugar mixture. Achieving the right temperature ensures a smooth coating that sets properly. Stirring continuously while heating prevents burning and uneven cooking, leading to perfectly coated candies.
Colorful Sugar-Coated Candies
📋 Ingredients
Main Ingredients
- 1 cup butterRoom temperature
- 1/2 cup granulated sugarFor sauce consistency
- 1/4 cup corn syrupAdds sweetness and binds
- 1 teaspoon vanilla extractFor flavor
- 1 pinch saltEnhances flavor
- 1/2 cup waterFor sauce consistency
For the Sauce
- 2 lbs chickenCut into pieces
- 1 1/2 cups flourFor coating
- 1 teaspoon garlic powderFor seasoning
- 1 teaspoon paprikaAdds color
- 1 teaspoon black pepperFor spice
- 1/2 teaspoon saltFor seasoning
- 1 cup buttermilkFor marinating
Instructions
Prepare Ingredients
Gather all your ingredients and make sure they are at room temperature for easy mixing.
Make Sugar Mixture
In a saucepan, combine sugar, water, and corn syrup over medium heat. Stir constantly until the sugar dissolves.
Color the Mixture
Divide the mixture into bowls and add food coloring to achieve desired colors. Mix well.
Coat Nuts/Fruits
Dip nuts or fruits into the colored sugar mixture and place them on a parchment-lined tray.
Chill to Set
Chill the tray in the refrigerator for about 30 minutes to harden the candy coating.
Melt Chocolate
Melt chocolate chips in a microwave-safe bowl or double boiler until smooth.
Dip Candies
Dip the hardened candies into melted chocolate and place them back on the tray.
Add Final Touches
Sprinkle with edible glitter or coconut flakes before the chocolate sets for decorative flair.
Recipe Notes & Tips
Storage Tips
Store Colorful Sugar-Coated Candies in an airtight container at room temperature for up to one week. If preferred, you can refrigerate them to prolong freshness.
Serving Suggestions
These colorful candies are perfect for party tables or as gifts in decorative bags. Pair them with a fun drink or serve them alongside a cake for a festive touch.
Recipe Variations
Experiment with different types of coatings such as white chocolate or dark chocolate. You can also use flavored extracts like almond or mint to create unique taste profiles.