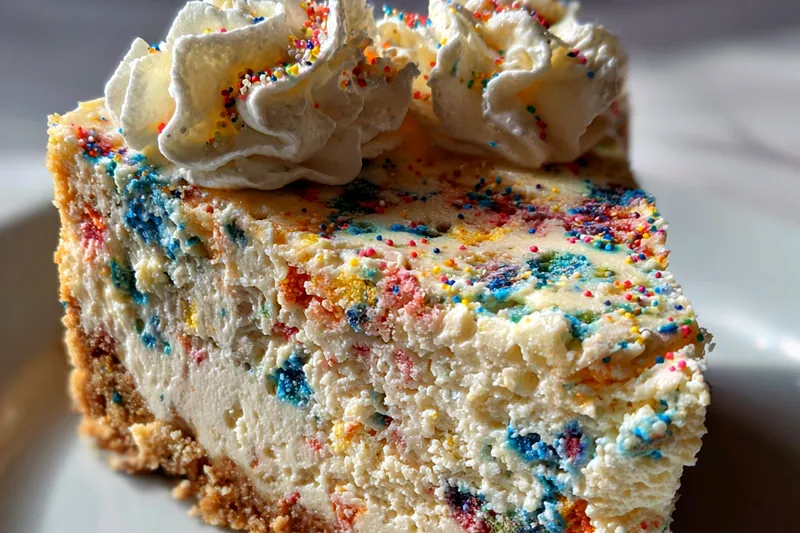
Colorful No-Bake Cereal Cake
The Colorful No-Bake Cereal Cake is a fun and whimsical dessert that brings joy to any gathering. With its vibrant colors and delightful crunch, this cake is not only easy to prepare but also a sure hit with both kids and adults. Perfect for celebrations or as a sweet treat after dinner, this no-bake cake is a versatile and exciting addition to your dessert repertoire. You'll love how simple it is to whip up this colorful cake without ever having to turn on the oven!


Why This Colorful No-Bake Cereal Cake Recipe Works
This recipe combines crunchy cereals with the sweetness of marshmallows and chocolate, creating a texture and flavor experience that everyone loves. The no-bake aspect means you can whip it up quickly without any fuss. It’s customizable, allowing for various mix-ins based on your preferences, making it a versatile dessert for any occasion.
The technique of folding the whipped cream into the peanut butter mixture is crucial for achieving a light and airy texture. This method ensures that the cake remains fluffy and not overly dense. By chilling it, you allow the flavors to meld while setting it perfectly, resulting in a beautiful, colorful cake that's as appealing to the eye as it is to the palate.
💡 Professional Tip
For a richer flavor, consider using a mix of different cereals or adding a layer of chocolate ganache on top before serving. This will elevate the cake and provide a more indulgent experience. Additionally, make sure the cake is well-chilled before slicing for the best results.
Frequently Asked Questions
Absolutely! You can prepare the cake a day in advance and store it in the refrigerator until you're ready to serve. This allows the flavors to develop even more. Just ensure it is well-covered to prevent it from drying out or absorbing odors from the fridge.
If you're looking for a substitute for mini marshmallows, you can use chopped gummy candies or marshmallow fluff instead. Both options will offer sweetness and a similar texture, ensuring your cake still turns out delicious.
The cake is ready once it has set properly in the refrigerator, which typically takes about 45 minutes. You can gently press on the top to check for firmness. It should hold its shape when removed from the pan and sliced.
Yes, you can freeze this no-bake cereal cake! Just ensure it is wrapped tightly in plastic wrap or aluminum foil, and store it in an airtight container. It should keep well in the freezer for up to a month. When ready to enjoy, thaw it in the refrigerator overnight before serving.
This cake pairs wonderfully with a scoop of vanilla ice cream or a drizzle of chocolate sauce. Fresh fruit or a light whipped cream on the side can add a refreshing touch to balance the sweetness.
The cake can last in the refrigerator for about 3-4 days if properly stored in an airtight container. However, for the best texture and flavor, it's recommended to enjoy it within the first couple of days.
Yes, preparing this cake in advance is a great idea! Just allow it to set and chill in the refrigerator, covered, until you're ready to serve. This can save you time on the day of your event.
Since this is a no-bake cake, reheating isn't necessary. It’s best served chilled. However, if you prefer a warm dessert, you can microwave individual slices for a few seconds, but be cautious not to melt the cake too much.
Recipe Troubleshooting Guide
Too Dry
Problem: The cake turns out crumbly and dry.
Solution: Ensure you are measuring your ingredients accurately, especially the butter and peanut butter. Adding a bit more melted butter can help bind the mixture better.
Not Crispy Enough
Problem: The cake lacks the desired crunch.
Solution: Make sure to use fresh cereal and consider adding more crispy elements like additional nuts or chocolate chips to enhance the texture.
Overcooked
Problem: The cake has a hard exterior.
Prevention: Since this is a no-bake recipe, it's crucial to avoid over-chilling. Make sure to remove it from the refrigerator after the recommended chilling time.
Undercooked Center
Problem: The center remains mushy and doesn't hold its shape.
Recovery: Ensure the cake is given enough time to set in the refrigerator. If the center remains soft, place it back into the fridge for additional time.
Burnt Exterior
Problem: The outer layer of the cake appears burnt.
Prevention: As this is a no-bake cake, the issue may arise from using overly hot ingredients. Make sure to let melted butter and peanut butter cool slightly before mixing.
Flavor Balance
Too Sweet: If too sweet, consider adding a pinch of salt or incorporating some unsweetened cocoa powder to balance the flavors.
Too Salty: If too salty, you can balance it out with a bit more sugar or additional marshmallows.
Bland: To enhance bland flavors, try adding vanilla extract or a sprinkle of cinnamon to the mixture.
Essential Ingredients for Colorful No-Bake Cereal Cake
The key ingredients in this recipe include colorful cereal, creamy peanut butter, and mini marshmallows. Each component contributes to the texture and flavor, creating a cake that's not only visually appealing but also deliciously addictive. Using a variety of cereals can enhance the crunch, while chocolate chips add a delightful sweetness to each bite.
When selecting your ingredients, opt for high-quality cereals and chocolate chips. Fresh ingredients will ensure the best flavor and texture. The nuts and fruits can be customized based on your preferences, making each cake a personal creation.
Essential Ingredient Notes
- Colorful Cereal: Choose a cereal that is vibrant and has a good crunch. This will not only provide texture but also make your cake visually stunning. Experiment with different types to find your favorite combination.
- Peanut Butter: Using creamy peanut butter creates a smooth mixture that blends well with the other ingredients. If you prefer a nutty crunch, chunky peanut butter can be a delightful alternative.
- Chocolate Chips: Opt for high-quality chocolate chips to enhance the overall flavor of your cake. Dark chocolate can add a rich depth, while milk chocolate offers sweetness.
Step-by-Step Cooking Process
Creating the Colorful No-Bake Cereal Cake is simple and fun. Gather all your ingredients and follow the steps to mix everything together gently. The folding technique is essential for keeping the mixture light and airy, ensuring a delightful texture.
Patience is key when it comes to chilling the cake. Allowing it enough time to set will yield the best results, creating a sturdy yet soft cake. The final finish with sprinkles or nuts adds a festive touch, making it perfect for any occasion.
Key Technique for Perfect Colorful No-Bake Cereal Cake
The most important technique in this recipe is the gentle folding of the whipped cream into the peanut butter mixture. This step is crucial for maintaining the airy texture of the cake. Avoid over-mixing, as it can lead to a denser cake. The right balance of mixing will result in a light, fluffy dessert that is as enjoyable to make as it is to eat.
Colorful No-Bake Cereal Cake
📋 Ingredients
Main Ingredients
- 1 cup butterRoom temperature
- 1 cup chocolate syrupFor drizzling
- 1/2 cup sprinklesFor topping
- 1/2 cup crushed nutsOptional topping
- 1/4 cup caramel sauceFor drizzling
For the Sauce
- 4 cups colorful cerealAny mix you prefer
- 1 cup mini marshmallowsSoft and fluffy
- 1 cup chocolate chipsMilk or dark
- 1 cup creamy peanut butterSmooth and spreadable
- 1 cup powdered sugarFor sweetness
- 1 cup heavy creamFor whipping
- 2 tsp vanilla extractPure vanilla
- 1/2 cup sprinklesFor decoration
- 1/2 cup chopped nutsOptional for crunch
- 1/4 cup melted butterFor binding
- 1/2 cup dried fruitOptional mix-in
- 1/2 cup shredded coconutOptional for texture
Instructions
Prepare the Base
In a large bowl, combine the colorful cereal and mini marshmallows. Set aside.
Mix Peanut Butter and Sugar
In another bowl, mix the peanut butter and powdered sugar until smooth.
Whip the Cream
In a separate mixing bowl, whip the heavy cream until stiff peaks form. Gently fold in the vanilla extract.
Combine Mixtures
Fold the whipped cream into the peanut butter mixture until well combined.
Add Cereal
Gently fold in the cereal mixture, chocolate chips, and any additional mix-ins like nuts or dried fruit.
Prepare the Pan
Line a cake pan with parchment paper, then pour the mixture into the pan, spreading it evenly.
Chill the Cake
Refrigerate for at least 45 minutes until set.
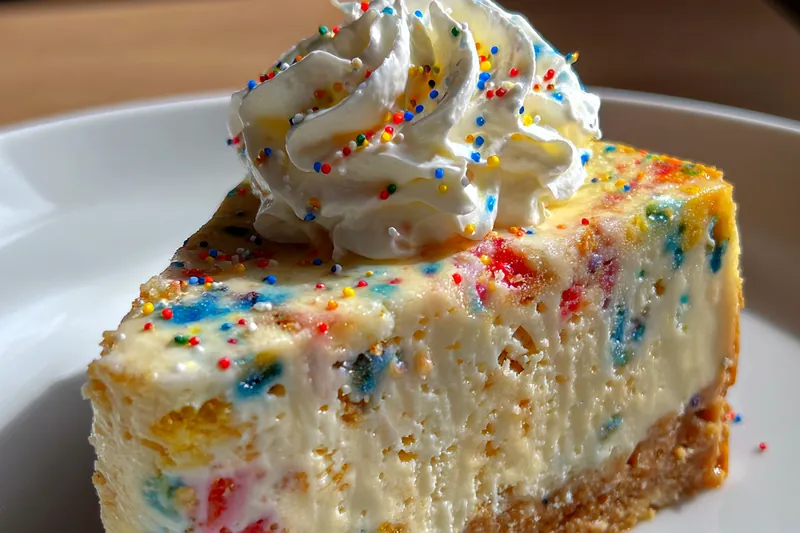
Serve and Enjoy
Remove from the pan, slice, and serve with a sprinkle of additional colorful toppings if desired.
Recipe Notes & Tips
Storage Tips
To keep your Colorful No-Bake Cereal Cake fresh, store it in an airtight container in the refrigerator. If you have leftovers, ensure they are well-covered to prevent drying out. The cake can be kept for 3-4 days in the fridge.
Serving Suggestions
Serve slices of the cereal cake with a scoop of vanilla ice cream or a dollop of whipped cream. For an extra treat, drizzle with chocolate or caramel sauce, and sprinkle with additional colorful toppings.
Recipe Variations
Feel free to get creative with this recipe! You can swap out the colorful cereal for your favorite type, incorporate different nuts or dried fruits, or even add a layer of frosting on top for a richer dessert experience.