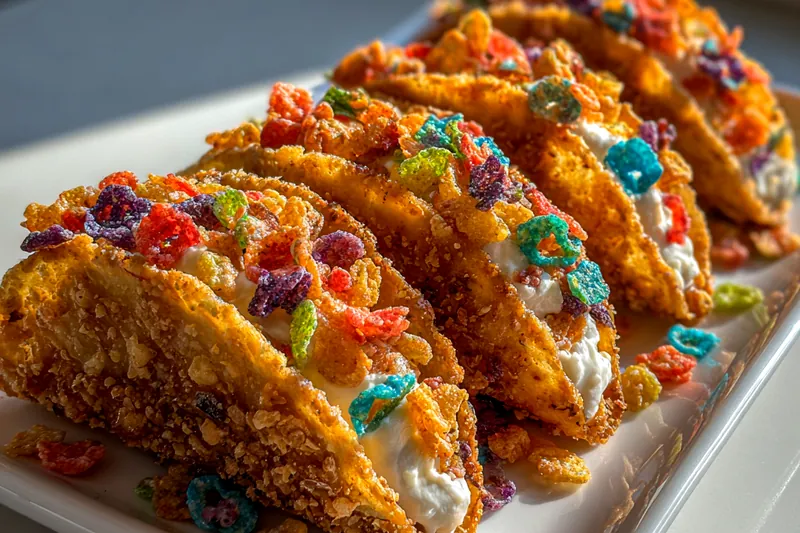
Colorful Cheesecake Tacos
Indulge in a delightful twist on traditional desserts with these Colorful Cheesecake Tacos! This fun and creative recipe brings together the creamy richness of cheesecake and the playful shape of taco shells. Perfect for parties or a family treat, these tacos are sure to impress everyone. With vibrant toppings and a delicious filling, they offer a feast for both the eyes and the palate.


Why This Colorful Cheesecake Tacos Recipe Works
This recipe for Colorful Cheesecake Tacos shines with vibrant colors and flavors, making it visually appealing and delightful to eat. The creamy cheesecake filling contrasts beautifully with the crunchy taco shell, creating a perfect texture combination. With the addition of fresh fruits and sprinkles, every bite is a mix of sweetness and freshness.
The technique of baking the taco shells ensures they hold their shape while providing a lovely crisp texture. The whipped cream adds lightness to the rich cheesecake filling, making these tacos feel indulgent yet balanced. This recipe is not only easy to follow but also allows for customization with your favorite fruits and toppings.
💡 Professional Tip
For the best results, ensure your cream cheese is at room temperature before mixing, as this helps achieve a smooth, lump-free filling. Additionally, folding in the whipped cream gently preserves the airy texture, making your cheesecake filling light and fluffy.
Frequently Asked Questions
Yes, you can prepare the cheesecake filling and taco shells ahead of time. Store the filling in an airtight container in the refrigerator for up to 2 days. Assemble the tacos just before serving to maintain the freshness of the toppings and prevent the shells from getting soggy.
You can substitute cream cheese with mascarpone cheese or a dairy-free cream cheese alternative if you want a lighter option. Greek yogurt can also work, but it may alter the flavor slightly and make the filling less rich.
These tacos are served cold, so no baking time is necessary. Just ensure the taco shells are baked until lightly golden and crisp. The cheesecake filling should be chilled and set, making it ready to enjoy right after assembly.
It is not recommended to freeze the assembled tacos, as the texture of the taco shells and fresh toppings may suffer. However, you can freeze the cheesecake filling for up to a month, allowing you to defrost and assemble the tacos fresh when needed.
These tacos are fantastic on their own as a dessert, but you can enhance your dessert table by serving them alongside vanilla ice cream, chocolate sauce, or a fruit compote. Fresh mint leaves also make a lovely garnish.
Assembled Colorful Cheesecake Tacos are best enjoyed fresh, but they can be stored in the refrigerator for up to 1 day. The taco shells may become slightly soft, so it’s best to assemble them just before serving.
Yes, you can make certain components in advance. Prepare the cheesecake filling and taco shells ahead of time and store them separately. Assemble the tacos just before serving to keep the shells crisp and the toppings fresh.
These tacos are served cold, so reheating is not necessary. If you prefer warm taco shells, you can briefly reheat them in the oven at 350°F (175°C) for about 5 minutes before filling them with the cheesecake mixture.
Recipe Troubleshooting Guide
Too Dry
Problem: If the cheesecake filling turns out dry or crumbly.
Solution: Make sure to properly whip the cream cheese and incorporate enough heavy cream. If you find it too dry, you can add a splash of milk or cream to loosen the filling.
Not Crispy Enough
Problem: The taco shells are not crispy after baking.
Solution: Ensure the taco shells are baked long enough and at the right temperature. Keep a close eye on them to prevent burning while ensuring they achieve the desired crunch.
Overcooked
Problem: If the taco shells become burnt or too hard.
Prevention: To prevent overcooking, set a timer and check the shells frequently as they bake. If they start to brown too quickly, lower the oven temperature slightly.
Undercooked Center
Problem: The cheesecake filling is not set properly.
Recovery: If the filling appears runny, you may need to chill it longer. Refrigerate the tacos for at least 2-3 hours to allow the filling to firm up before serving.
Burnt Exterior
Problem: The outer shells of the tacos have burned.
Prevention: Ensure you bake the taco shells only until they are lightly golden and adjust the heat as needed during baking to prevent burning.
Flavor Balance
Too Sweet: If the filling is too sweet, add a pinch of salt to balance the flavors.
Too Salty: If the filling tastes too salty, consider adding a little more cream cheese to neutralize the saltiness.
Bland: Enhance the flavor by adding a splash of vanilla extract or more fresh fruit puree for a vibrant taste.

Essential Ingredients for Colorful Cheesecake Tacos
The key ingredients for Colorful Cheesecake Tacos include high-quality cream cheese, fresh fruits, and colorful sprinkles. These components not only contribute to the flavor but also enhance the visual appeal of the dish. Using fresh fruits like strawberries and blueberries adds natural sweetness and a burst of freshness.
Always opt for high-quality cream cheese for a smooth and rich filling. The taco shells should be sturdy enough to hold the filling without breaking. Quality ingredients ensure that your dessert tastes as good as it looks.
Essential Ingredient Notes
- Cream Cheese: Choose full-fat cream cheese for the best flavor and texture. Make sure it's at room temperature for easy mixing, resulting in a smooth and creamy filling.
- Fresh Fruits: Select ripe, fresh fruits that are in season for the best taste. Wash and dry them thoroughly before use to maintain their vibrant colors and flavors.
- Taco Shells: Use mini taco shells for an optimal ratio of filling to shell. Make sure they are sturdy enough to hold the filling, preferably made from corn for added texture.
Step-by-Step Cooking Process
Creating Colorful Cheesecake Tacos is a straightforward process that begins with baking the taco shells. Once cooled, prepare the creamy cheesecake filling and assemble the components for a beautiful presentation. The process allows for room to add personal touches with various toppings.
The key to achieving perfect results lies in the careful assembly of each taco. Layering the filling and toppings thoughtfully not only enhances the visual appeal but also ensures that every bite is a delightful mix of flavors and textures.
Key Technique for Perfect Colorful Cheesecake Tacos
The most important technique is to ensure the cream cheese is fully softened before mixing. This prevents lumps in your filling and allows for a silky smooth consistency, which is essential for the overall texture of the tacos.
Colorful Cheesecake Tacos
📋 Ingredients
Main Ingredients
- 1 cup butterRoom temperature
- 1 cup sugarGranulated
- 1/2 cup milkWhole milk
- 1/2 cup cocoa powderUnsweetened
- 1 tsp vanilla extractPure vanilla
For the Sauce
- 1 lb cream cheeseSoftened
- 2/3 cup powdered sugarFor sweetness
- 1 tsp vanilla extractFor flavor
- 1/2 cup heavy creamFor whipping
- 1 cup crushed graham crackersFor crust
- 1/4 cup unsalted butterMelted
- 1/4 cup colorful sprinklesFor decoration
- 3/4 cup mixed fresh fruitsChopped
Instructions
Prepare the Taco Shells
Preheat your oven to 350°F (175°C). Arrange taco shells on a baking sheet and bake for 10 minutes until lightly golden.
Make the Cheesecake Filling
In a mixing bowl, beat the softened cream cheese, powdered sugar, and vanilla extract until smooth and creamy.
Whip the Cream
In a separate bowl, whip the heavy cream until stiff peaks form. Gently fold the whipped cream into the cheesecake mixture.
Combine Crust Ingredients
In another bowl, combine the crushed graham crackers and melted butter. Mix well until crumbly.
Assemble the Tacos
Spoon the cheesecake filling into the baked taco shells. Top generously with the graham cracker mixture.
Add Colorful Toppings
Sprinkle colorful sprinkles and fresh fruit over the cheesecake filling.
Drizzle and Garnish
Drizzle with chocolate syrup and fruit preserves. Finish with whipped cream and edible flowers for decoration.
Serve
Serve immediately or refrigerate until ready to serve. Enjoy your colorful cheesecake tacos!
Recipe Notes & Tips
Storage Tips
Store any leftover assembled tacos in the refrigerator for up to 1 day. Keep them in an airtight container to maintain freshness. If storing components separately, the filling can last up to 2 days in the fridge.
Serving Suggestions
Serve Colorful Cheesecake Tacos with a side of whipped cream or vanilla ice cream. Garnish with fresh mint leaves or additional fruits for an extra touch. These tacos make a great centerpiece for any dessert table.
Recipe Variations
Feel free to experiment with different toppings, such as chocolate chips, caramel drizzle, or various fruit purees. You can also create a theme by changing the color of sprinkles to match occasions like birthdays or holidays.