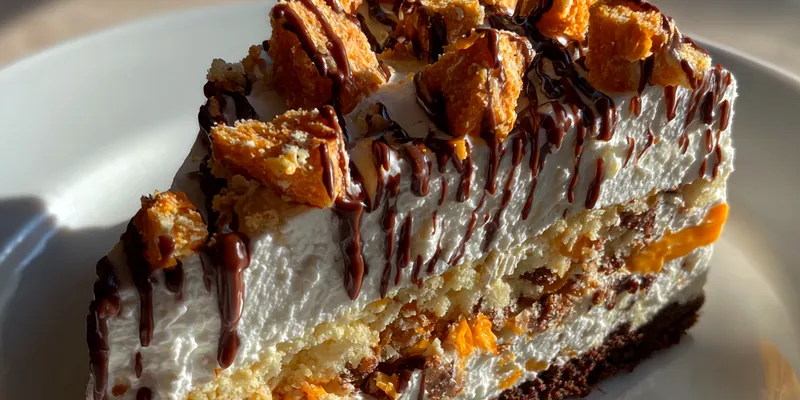
Decadent Butterfinger Delight
The Decadent Butterfinger Delight is the ultimate indulgence for any sweet tooth. This dessert combines creamy peanut butter, luscious chocolate, and crunchy Butterfinger pieces for a rich, satisfying treat. Perfect for parties or a cozy night in, it's sure to impress your guests and leave them wanting more!

Why This Decadent Butterfinger Delight Recipe Works
This Decadent Butterfinger Delight stands out due to its unique layering of textures and flavors. The creamy peanut butter base paired with the crunchy Butterfinger provides a satisfying contrast that delights the palate. The use of quality chocolate and fresh ingredients ensures a rich taste.
Each bite offers a perfect balance of sweetness and creaminess, making it irresistible. The no-bake method not only simplifies the process but also helps maintain the creamy texture that sets this dessert apart.
💡 Professional Tip
For an even richer flavor, use high-quality chocolate and let the dessert chill overnight. This allows the flavors to meld beautifully.
Frequently Asked Questions
Yes, you can prepare this dessert a day in advance. Just store it in the refrigerator until you're ready to serve. This can enhance the flavors as they have more time to develop.
You can use mascarpone cheese or a dairy-free cream cheese alternative if you're looking for a lighter option. Both will provide a similar creamy texture without compromising flavor.
This dessert is made using a no-bake method, which maintains the creamy texture and allows the ingredients to shine. Chilling in the refrigerator is essential for setting the layers.
To balance the sweetness, ensure you use unsweetened cocoa powder in the chocolate layer. Additionally, you can reduce the amount of powdered sugar in the peanut butter base if desired.
The dessert is ready when it is firm to the touch and has set properly after chilling. A good indicator is when it holds its shape when cut into squares.
This dessert pairs beautifully with a scoop of vanilla ice cream or a dollop of whipped cream. A drizzle of chocolate sauce on top can add an extra touch of indulgence.
Yes, consider using natural peanut butter and reducing the sugar content. You can also opt for low-fat cream cheese and use dark chocolate for a richer flavor with less sugar.
Store leftovers in an airtight container in the refrigerator for up to 3 days. For best results, allow it to come to room temperature before serving again.
Recipe Troubleshooting Guide
Dessert Too Soft
Problem: If your dessert is too soft and hasn't set properly.
Solution: Ensure it is refrigerated long enough, ideally overnight. You can also try adding more powdered sugar to achieve a firmer texture.
Chocolate Layer Cracked
Problem: If the chocolate layer cracks when cutting.
Solution: Allow the dessert to sit at room temperature for a few minutes before cutting. This helps the chocolate soften slightly and prevents cracking.
Too Much Peanut Butter Flavor
Problem: If the peanut butter flavor overpowers the dessert.
Prevention: You can balance this by adding a bit of cream cheese or reducing the peanut butter by 1/4 cup next time you make it.
Sugary Aftertaste
Problem: If the dessert has an overly sugary taste.
Recovery: Use unsweetened cocoa powder and dark chocolate to counteract the sweetness in future batches.
Uneven Layers
Problem: If the layers don't appear even.
Prevention: Use a spatula to spread each layer evenly. Relax and take your time to ensure each layer is level.
Flavor Balance Issues
Too Sweet: If the dessert is too sweet, add a touch of salt to enhance the flavors.
Too Salty: If it has a salty taste, add more sweet ingredients to balance it out.
Bland: If the dessert is bland, enrich the flavor with additional vanilla extract or a dash of espresso powder.
Choosing the Best Ingredients for Decadent Butterfinger Delight
Selecting high-quality ingredients is crucial for the best flavor in Decadent Butterfinger Delight. Opt for natural peanut butter, premium chocolate, and fresh cream to elevate the overall taste. The quality of each component directly impacts the final product.
When preparing ingredients, ensure the cream cheese is at room temperature for easy mixing. Crush the Butterfinger bars into small pieces but not too fine, maintaining a satisfying crunch in every bite.
Essential Ingredient Notes
- Peanut Butter: Choose creamy or chunky peanut butter based on your preference for texture. Natural peanut butter without added sugars or oils will give the best flavor and consistency.
- Chocolate Chips: Select high-quality semi-sweet or dark chocolate chips. They melt beautifully and will provide a rich flavor that balances the sweetness of the dessert.
- Butterfinger Bars: Use fresh Butterfinger bars for the best crunch and flavor. The contrast between the creamy base and crunchy topping makes this dessert truly special.

Mastering the Cooking Technique
The key to mastering Decadent Butterfinger Delight lies in the layering technique. Each layer must be spread evenly to create distinct sections that hold together when served. Take your time to ensure a smooth finish for each layer.
Pay attention to chilling times, as this dessert requires adequate refrigeration to set properly. Visual cues include a firm texture that holds its shape and a glossy chocolate layer that glistens.
The Secret to Perfect Decadent Butterfinger Delight
The secret to achieving the perfect Decadent Butterfinger Delight is in the balance of flavors and textures. Ensure you use high-quality ingredients and allow enough time for the dessert to chill, which enhances the overall taste and consistency.
Decadent Butterfinger Delight
📋 Ingredients
Base Ingredients
- 1 cup creamy peanut butterProvides a rich, nutty flavor
- 1 cup powdered sugarAdds sweetness and helps firm the mixture
- 1 teaspoon vanilla extractEnhances the overall flavor
- 1/2 cup unsweetened cocoa powderProvides a rich chocolate flavor
- Pinch of saltBalances sweetness
Filling Ingredients
- 8 oz cream cheese, softenedCreates a smooth and creamy texture
- 1 cup heavy creamWhipped for lightness
- 1 cup Butterfinger candy bars, crushedAdds crunch and flavor
- 1/2 cup granulated sugarSweetens the chocolate layer
- 1 cup chocolate chipsFor the rich chocolate layer
- 1/2 cup milkUsed in the chocolate layer
Instructions
Mix the Peanut Butter Base
In a mixing bowl, combine creamy peanut butter, powdered sugar, and softened cream cheese. Beat until smooth and creamy.
Add the Whipped Cream
In another bowl, whip the heavy cream until soft peaks form. Gently fold the whipped cream into the peanut butter mixture until well combined.
Incorporate Vanilla and Chocolate
Add the vanilla extract and melted chocolate chips to the peanut butter mixture. Stir until fully integrated.
Prepare the Chocolate Layer
In a small saucepan, combine milk, cocoa powder, and granulated sugar. Heat until the mixture is smooth and well combined.
Layer the Mixture
In a greased 9x9 inch pan, pour half of the peanut butter mixture. Spread it evenly before pouring half of the chocolate layer on top.
Add the Crunchy Butterfinger
Sprinkle crushed Butterfinger candy bars evenly over the chocolate layer, then cover with the remaining peanut butter mixture.
Final Chocolate Layer
Pour the remaining chocolate mixture over the top. Use a spatula to smooth it out.
Chill and Set
Cover the pan with plastic wrap and refrigerate for at least 4 hours or until the dessert is firm.
Serve with Toppings
Before serving, sprinkle with additional Butterfinger crumbs for garnish. Cut into squares and enjoy!
Recipe Notes & Tips
{{note_1_title}}
{{note_1_content}}
{{note_2_title}}
{{note_2_content}}
{{note_3_title}}
{{note_3_content}}